Tuesday, March 31, 2009

Up to date

Despite being in a "holding pattern" so to speak things have come along recently so here are some up to the minute photos for you...
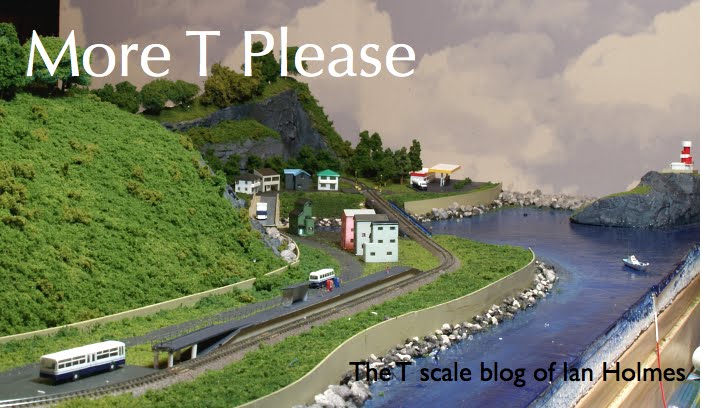
1. A view along the layout with the train pausing at the small station
2. The mouth of the river showing the railway and the road bridge
3. Another view of the river mouth with the lighthouse in the foreground. Yes it will work. In the distance you can make out the petrol station that i have started on. It will include model petrol pumps.
4. A view of the hill behind the station. A model of a Shinto Shrine will be placed up here as signified by the two Torii gates modelled up there.
There we go that is the state of play currently. The roadways have yet to be bedded in and there are a couple of level crossings to install before I can fix the track in place.

Tuesday, March 24, 2009

Holding pattern

Things are a bit quiet on the T front at the moment.
I'm in an enforced holding pattern.
I'd like to get the track laid before I do anything more scenically. I think it would make more sense. I can't lay the track until I receive the upcoming level crossing. Which isn't until April so until then I sit and twiddle my thumbs or start a new blog on my 4mm scale modelling. You can read about that at http://4mmscaleagonies.blogspot.com/ Of course, if you're only interested in T then there won't be much there to interest you. But if, on the other hand, you like to read the ramblings of a frustrated railway modeller you might enjoy it.

Wednesday, March 18, 2009

Touching up the track

Several months ago, in his Blog, David K Smith detailed his method for improving the Set track that comes with the Eishindo train set. You can read that here. I've been impressed with this since the moment I saw it and vowed to have a go. The end result and comparison shot is here.
I basically followed Davids' method except I did not paint the sides of the rail a rusty colour. I thought that just too fiddly. I thought that the difference would not be that noticeable. But even so with that stage missing, the painted track is still a huge improvement over the Eishindo product. I'm glad I did it.
This is one of those jobs that you have to be in the mood for. I tried several times to get started on the job and it took me three sessions over three evenings to do just one foot of track. Then another night, I switched to a different paint brush (a 18/0 spotter as opposed to a 000) and I did the rest of the track for the visible section of the layout in 90 minutes.
Was it the brush? I think it helped somewhat, as with such a small brush its difficult to overload it with paint. But I also think that I was in the mood to do it.
Thats just one more thing I never imagined doing when I started out on this T scale journey.

Friday, March 13, 2009

The battle of the little people

Today I picked up a package from Japan from the post office. This one was the latest sets of little people from Eishindo. Who would believe that this tiny modelling scale would yield a selection of over 300 people to populate a layout!
Eishindo has 4 packs of people with 32 people in each pack and the Eduard etch of QE2 passengers has 180 passengers and crew...
I thought it might be interesting to compare and contrast the two ranges to see what is available to you. They are two very different types.
Firstly the Eishindo range. I'm thinking these figures must be injection moulded as they come attached to a sprue. As such these people are modelled in three dimensions. Running people have their legs behind and in front of them. There are also some very interesting poses. People running as I have just stated, people sat reading newspapers, a man carrying a child on his shoulders are some examples. All recreated very nicely, get in close with a magnifying glass and you can tell what they are.
Where these figures are let down is in the painting. Quite how these are even painted at all is a mystery to me. David K Smith postulated on "talking t gauge" that perhaps they were printed with an ink jet printer. As you can see from the extreme close up paint does indeed seem to be thrown at the figures. This picture is of set 005.
To give you an idea of size the mounting pin that the people are stood on is 1mm across. Figures below are from set 004
But as you get further away from them the painting becomes less noticeable. These figures below are from set 003 and are nearest to actual size. They are delicate and great care will need to be exercise when mounting them on the layout.
Compare these to the Etched figures from Eduard sold though Mr Hobby/Gunze Sangyo of Japan. These are flat etched nickel silver people. So they are flat, no people running. The most animated they get is a person waving an arm. But the painting/printing on these is outstanding. You can make out ties, belts, hair colours and faces.
The Eduard figures are available here.
So "You pays yer money and you takes yer choice" as they say. In this scale, at this size no one product is better than the other. It's two different bites of the same apple. There's a dynamism and reality to the Eishindo figures that the flat static Eduard ones just don't have. But because of the wildly different standard of finishing it might be unwise to mix them in the same scene. Clearly I'm going to have to take a deep breath, don my magnifier and learn to paint Eishindo figures. As with a little care I think they could be very very nice indeed.

Thursday, March 12, 2009

On the Buses...

It's amazement time again.
If there is one thing that T gaugers are in dire shortage of it's road vehicles.
Eishindo supply some delightful boats, some impossibly tiny bikes. But as yet no road vehicles. But fear not, for there are other avenues to get the automobiles for your T gauge world.
Through "talking t gauge" I came across a company called Gemini Jets. Who make (not unsurprisingly) model jet airliners to 1:400 scale. They also make a supporting range of airport structures and support and maintenance vehicles. Now 1:400 is not 1:450 but when it comes to a bus or a delivery truck it's not really going to make much difference I think.
Pictured here these are quite a delightful selection of vehicles. So I succumbed and ordered a box.
I placed the order on Monday lunchtime. Wednesday afternoon they were on the doorstep when I got home. Awesome service from Gemini Jets and Past-time hobbies of Illinois.
Once again, as always, when I opened the package I was amazed. The quality is superb. For this tiny size the detail is amazing. The buses have seats inside for Pete's sake! The Catering truck and the cargo loader have boxes and decks that raise as the real things do! No flash, no ridge lines. Lovely paint jobs. The box says "models for craftsmen built by craftsmen". I won't argue there. The price of these delightful items $23.95. Not cheap. But worth it.
Lets look at the vehicles. There are two buses that will be useable without any modification whatsoever and the same can be said for the fuel tanker.
The large catering truck and the smaller truck with steps could easily be converted to ordinary delivery vehicles without too much trouble I imagine. I suppose I'll get to find out in the not too distant future... I imagine that the cargo and luggage loaders and aircraft pullers will be difficult if not impossible to do anything with. the same might be said for the luggage trolleys. But I have to wonder if anyone will try to convert the tiny tractor unit that hauls the luggage trolleys to resemble a jeep. I think that is do-able.
Gemini Jets are at www.geminijets.com

Sunday, March 8, 2009

Craggy Island

"Now Dougal these are small, but those are far away"...
So runs my favourite ever line from the great comedy series "Father Ted". We know these are small. The lighthouse is about 1 inch tall, and the prototype is far away (to me) so it's an appropriate quote to use.
For quite a while now my model of Torii Saki lighthouse has sat on a shaped block of white polystyrene. Once it got referred to as the "iceberg" on the "talking t gauge" forum, I figured it was about time to get on and produce a better island for the lighthouse to stand on. A dig around on the internet came up with a decent picture of the craggy island that the prototype stood on. So I set to with my hot wire cutter and hacked the styrene into something that resembled the shape of the island in the photograph before me. Then I coated it with lightweight spackle and painted it up and gave it the scenic treatement much as I did with the rest of the rock faces on the layout. The result is seen below.
The Island itself will be connected to the mainland by a rocky causeway much as the protoype is. The finishing touches to the island will be to add the light to the lighthouse, bed the lighthouse onto the island and fit it in place. Another element of the layout nears completion.

Monday, March 2, 2009

Stoppit stoppit stoppit!!!

Sometimes the T gauge world gets crazy exciting. Now is one of those times. For in one of my regular looks at the Hobbysearch website I discovered this. The level crossing is now available to order! I need two of these fellows for Gonou. Another impossibly tiny piece of scenic neccesity.
Delivery is scheduled for April. My order is placed...

Get yer Hanky(us) out...

I was so busy with making things this weekend I neglected to mention the other T gauge occurence of note.
For longer than I care to remember. I've been on the waiting list for the forthcoming Hankyu 9000 unit model at Hobby search in Japan. Deadline dates for the release of the model have come and gone and changed and come and gone for months now. The release of the Hankyu is important. The train has a new drive train ('scuse the pun) for improved performance and is a delightful looking model to boot.
On Saturday morning I got an email telling me that I could place an make a reservation/order for one.
I still don't know how far off release date for the model is, but at least I've ordered one.

Sunday, March 1, 2009

Decisions decisions

Well, not 5 minutes after I posted the first picture of the road bridge on the talking T gauge forum I was greeted with a post from one of our antipodean cousins* (Australians) to the effect of how they thought that the single pier in the middle of the river didn't look right. It wasn't until this was mentioned to me that I thought.
"You know what? They're right". As the piers take only a matter of minutes to construct using styrene strip I made another one and fitted it in place.
It makes a huge improvement.
Another glowing advert for the effectiveness of the talking T gauge forum...

* OK so I know that technically Australia is only antipodean to the UK. But I'm from the UK so Australia will always be the antipodes to me (besides I really like the word)...

The other bridge

Another day and another modelling project approaches completion. This time it's the "other bridge". The road bridge that sits behind the railway bridge. When I left it a few posts ago I was mulling over the idea of the central pillar. Well today I quickly made one installed it and decided it looked right. So it became a part of the bridge and now painted, it makes the bridge look right. The bridge is based on no real prototype, just an amalgam of images off the internet. But it definitely looks like a proper bridge to me.That's another project done bar the weathering and installation. Progress is getting exciting.